Prusa i3 MK2.5/S

The Prusa MK2s is a great workhorse machine that produces consistently high quality prints. This machine is provided to print shop filament only in order to maintain a consistent and simple user experience. This is the recommended machine for new or casual users, or anyone wishing to run off prints without having to purchase and store an entire spool of filament.
The filament we use is MatterHackers PRO Series PLA, which is being stored in a humidity controlled airtight container. The filament is fed through a tube to the printer in order to keep it dry and dust free for the entire filament path.
Printing Guide
Using Shop Filament
In general, Lowell Makes does not provide materials and consumables. In the interest of convenience, the 3D Printing Shop has chosen to make filament available for purchase on a per-print basis. The filament pricing is calculated at-cost, and all payments will be used to buy future spools. Pricing on "shop filament only" machines is calculated by the Octoprint server. If other spools of shop filament are available, their pricing (in $/unit length and $/unit mass) will be listed on the spool.
Paying cash on a per-print basis is fine, but we ask that you round up to the next 25¢. You can also pay in $5 increments and take a filament voucher card. As you print, use the voucher to track your usage by marking off squares on the card. Each square represents 25¢, and each row $1. Filament payments are on the honor system, so you may keep your own ledger if you wish. If you want to pay via PayPal, there is a $5 minimum to keep the fees manageable, but you may use any excess towards future prints.
Slicing
Prusa Control is the recommended slicer for the Prusa i3 MK2s. It is very simple to use. For most prints the default settings will work well. Once the software is open, import your STL model using the file menu or by drag-and-dropping it into the window. Check it's placement on the bed and that it fits within the build area. Press Generate to calculate the tool path. Save the .gcode file to your personal folder on the boottmill drive.
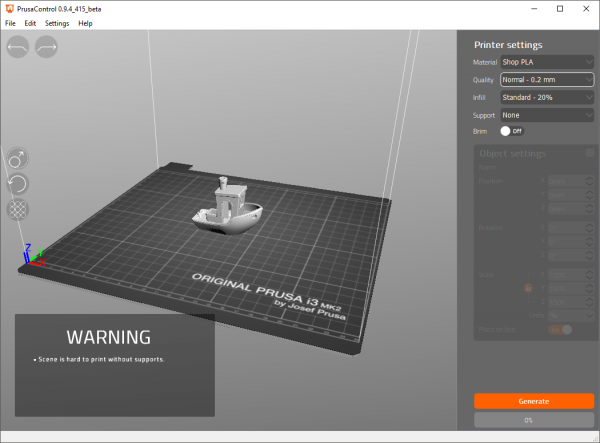
Loaded Model, Settings
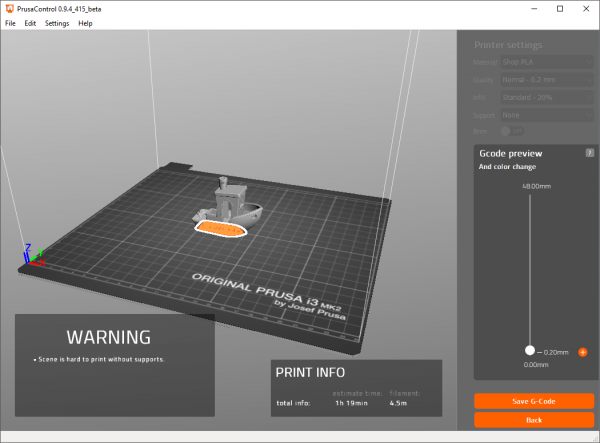
Sliced Model, Visualized gcode


Printing
An Octoprint server is running on a Raspberry Pi connected to the printer. Open a browser and connect to the server by typing prusa.lowellmakes.lan/ into the address bar or by clicking the Prusa bookmark. Log in if needed and insure that the printer is connected. Upload your .gcode file using the Upload button, or by drag-and-droping the file into the window. Once the upload is complete, press the Load icon next to the file name. Once the file is loaded, the price of the print will be displayed in the status menu. Press Print to start printing your model. Always be sure to watch the first layer complete to make sure it sticks to the bed. If the first layer does not stick to the bed, Cancel the print and remove the failed parts from the bed. Then restart the print or modify the slicer settings depending on the failure. If you need help with a difficult print, please contact [email protected] or the shop Basecamp.
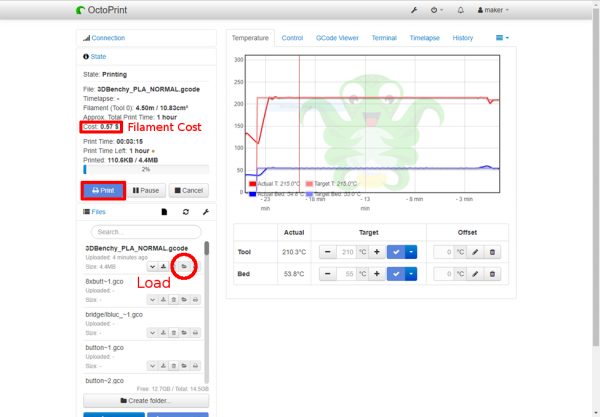
Octoprint Window

Removing The Print
When your print is finished, let the nozzle and heatbed cool down before removing the printed object. When the bed is hot objects are very hard to remove, so always wait for it to cool down first. Pull the bed towards you and remove the object gently. If you experience any trouble removing the object, you can use one of the provided spatula tools to pry it off. Slide the spatula under the corner of the object and gently push, until the print pops off. Be careful not to dig into the PEI on the bed.